DIY PINCH-PLEAT CURTAINS FROM TABLECLOTHS
/hola! it's been a long time since i've shared a project, no? this was a fun one i completed in july. keep reading and i'll show you how i made pinch-pleat curtains from tablecloths!
first things first. i relied very heavily on this tutorial from prudent baby. and because there is no need to reinvent the wheel, i'll do a fly-over version and if you want more details on how to do this, go there. the instructions are really clear.
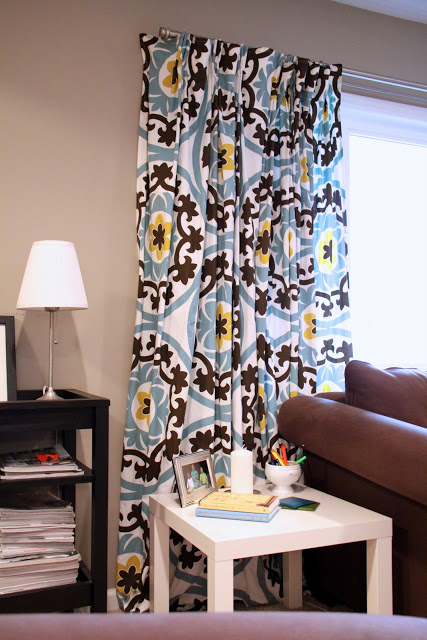
so . . . curtains. yes. we have a huge window in our living room——i think about ten feet wide. our contractor mentioned that in new construction, he doesn't like to put in such big windows because large treatments are difficult to find or super expensive. he was right. i got an estimate for roman shades and i might have choked a little bit when i saw the number. eek.
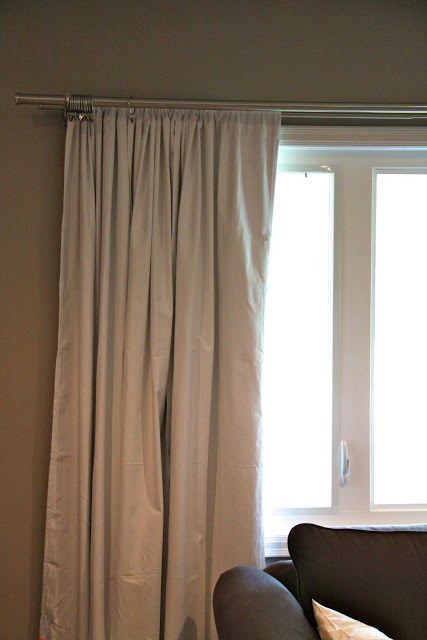
the temporary fix was to find an extra-long double rod (from bb&b) and some blackout shades. this room faces full west and the sun gets really glaring in the evenings. plus, it's where we watch tv, so it is nice to be able to get the room really dark. we lived with these polyester curtains only for a long time.
i started to think about fabrics for this room, but i was really not looking forward to spending tons of money for all the yardage to make curtains so large. then, lightning struck.

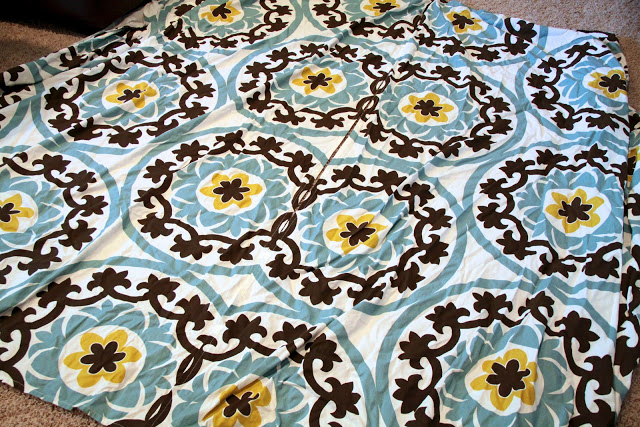
we had been using this tablecloth to cover a folding table we were using as a desk, and i just love love love the pattern and colors and i knew i liked it in this room. i had bought it at target for like five bucks. my sister-in-law lauren had also bought it too but wasn't going to use it, so she gave me hers. and luckily enough, they were still available on target.com and amazon. i used an amazon giftcard to buy a few more. (i used four total of the 60" x 84" size, which happened to be both the perfect length and width. so cool. my original one was bigger and i didn't end up using it.)
it was so great to buy tablecloths, because they were relatively inexpensive and already nicely hemmed! it was just a matter of sewing them together (two for each side). the patterns didn't line up perfectly, but that is the tricky part about using such a large-scale pattern. i'm okay with it.
i already had some curtain rings i wanted to use so that the curtains would slide nicely (we open and close them all the time). once i had them sewed up, i hung them and . . . they looked terrible. because i needed so much fabric to cover the window and still have them look nice and billowy, they were all gapped and you could see the blackout liner behind. not pretty.
so i gathered up a bunch of joann's coupons and bought the materials needed to make pinch pleats.
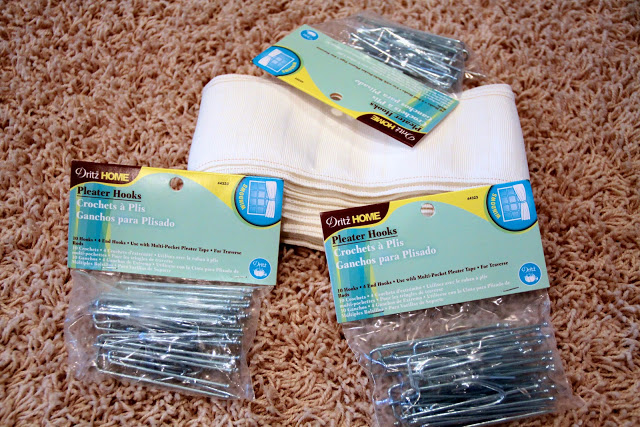
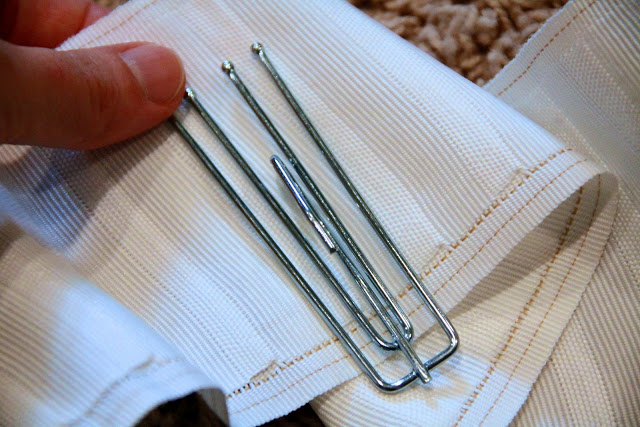
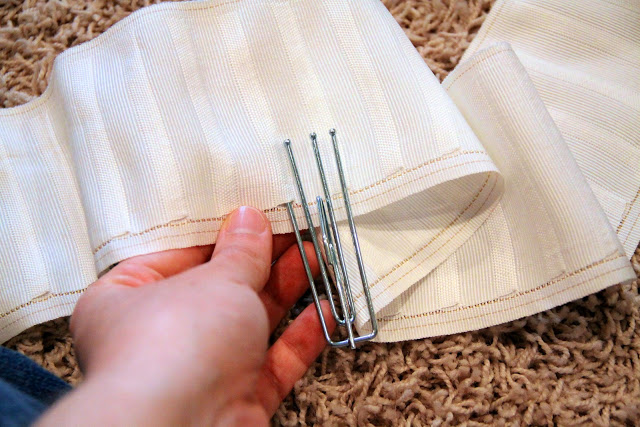
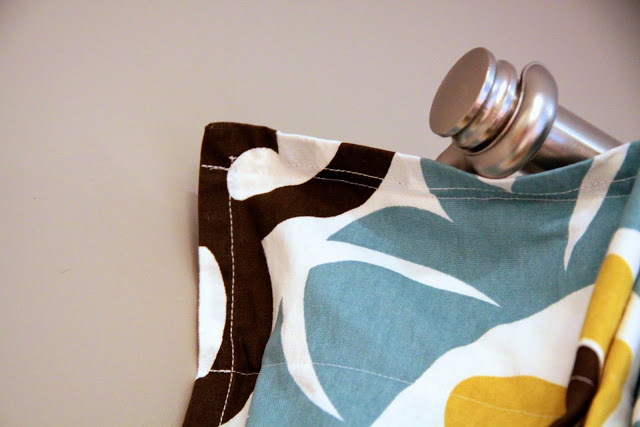
the pleat tape has little pockets that you stick the hooks through. let me show you.
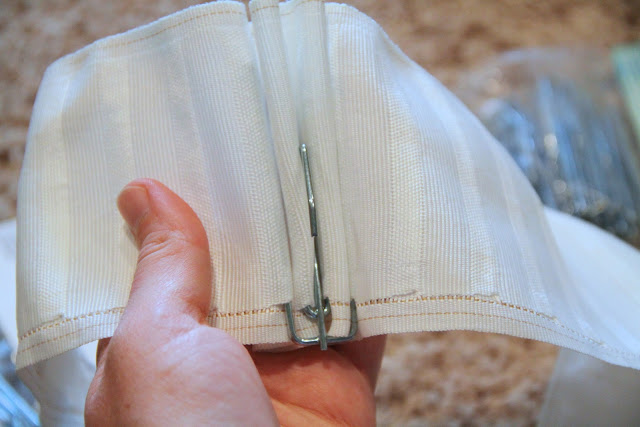
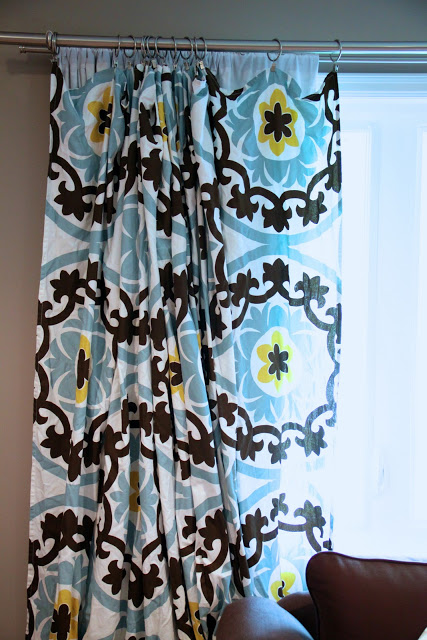
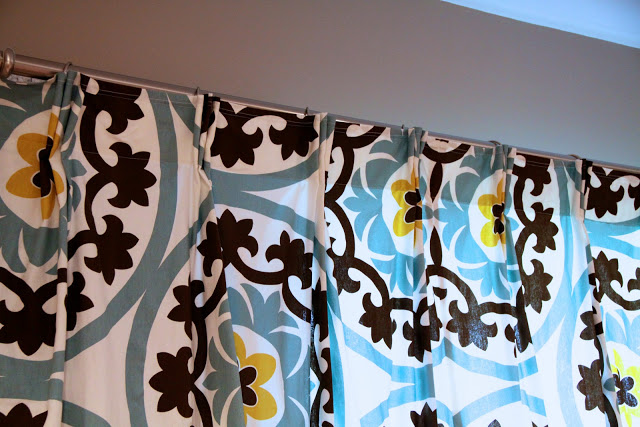
and this is what the front looks like: a nice little triple pleat.
you sew the pleater tape to your fabric. super easy——straight lines! just make sure the pockets face the back. :) once it is attached, make your pleats (i think i skipped two pockets between each prong to make my pleats really defined) and attach the hook on each pleat to your curtain rings. i had to do some serious jimmying to get this to work (my curtain rings had clips).
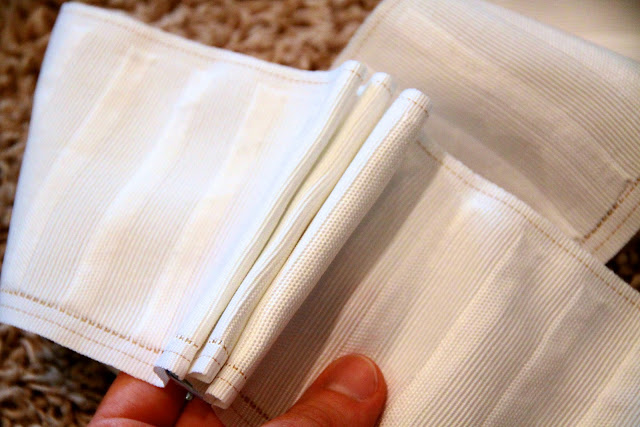
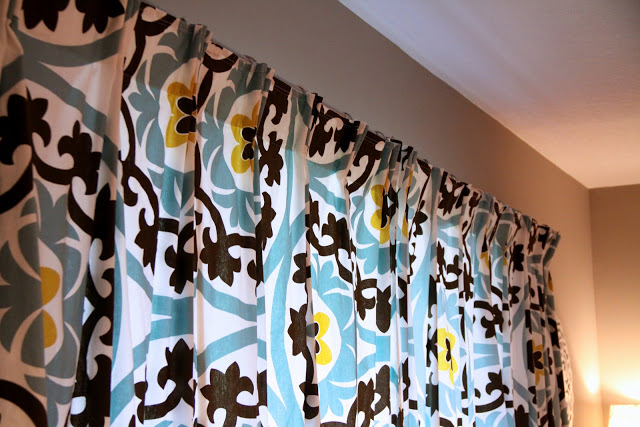
and here they are! i love how tidy they look. the lines fall really well without a lot of fussing.

i used a nail and a paperclip (i'm super fancy) to attach the fabric to the wall so that the return is nice and clean and to cover the blackout shades behind the curtains. maybe i'll buy finials for the rod ends someday.
but i really like how the curtains look when they are closed. with the pleats, they are the perfect width and the pleats make nice movement. sometimes we just close the curtains, and sometimes we close both the blackouts and the curtains. i could have just attached the blackouts to the curtains, but it is kind of nice to have the option.
so there you have it, folks! as promised, i have a few more projects to share, so do stick around. see you soon!